Last year, was a big year for our family. We were fortunate enough to plan a huge trip to Disney during the week of Halloween. We surprised the boys the Morning of our departure,October 30th. They were in disbelief! It was the best "Dream come true" moment for me. Keeping the trip a surprise was exciting yet exhausting. I was trying to keep Halloween at home just the way we usually do. Busting out the decorations full throttle, costume parties, pumpkin carving, etc. All the while, packing, planning, checking and rechecking our itinerary. Well, it came off without a hitch and we had the best vacation ever!!!!
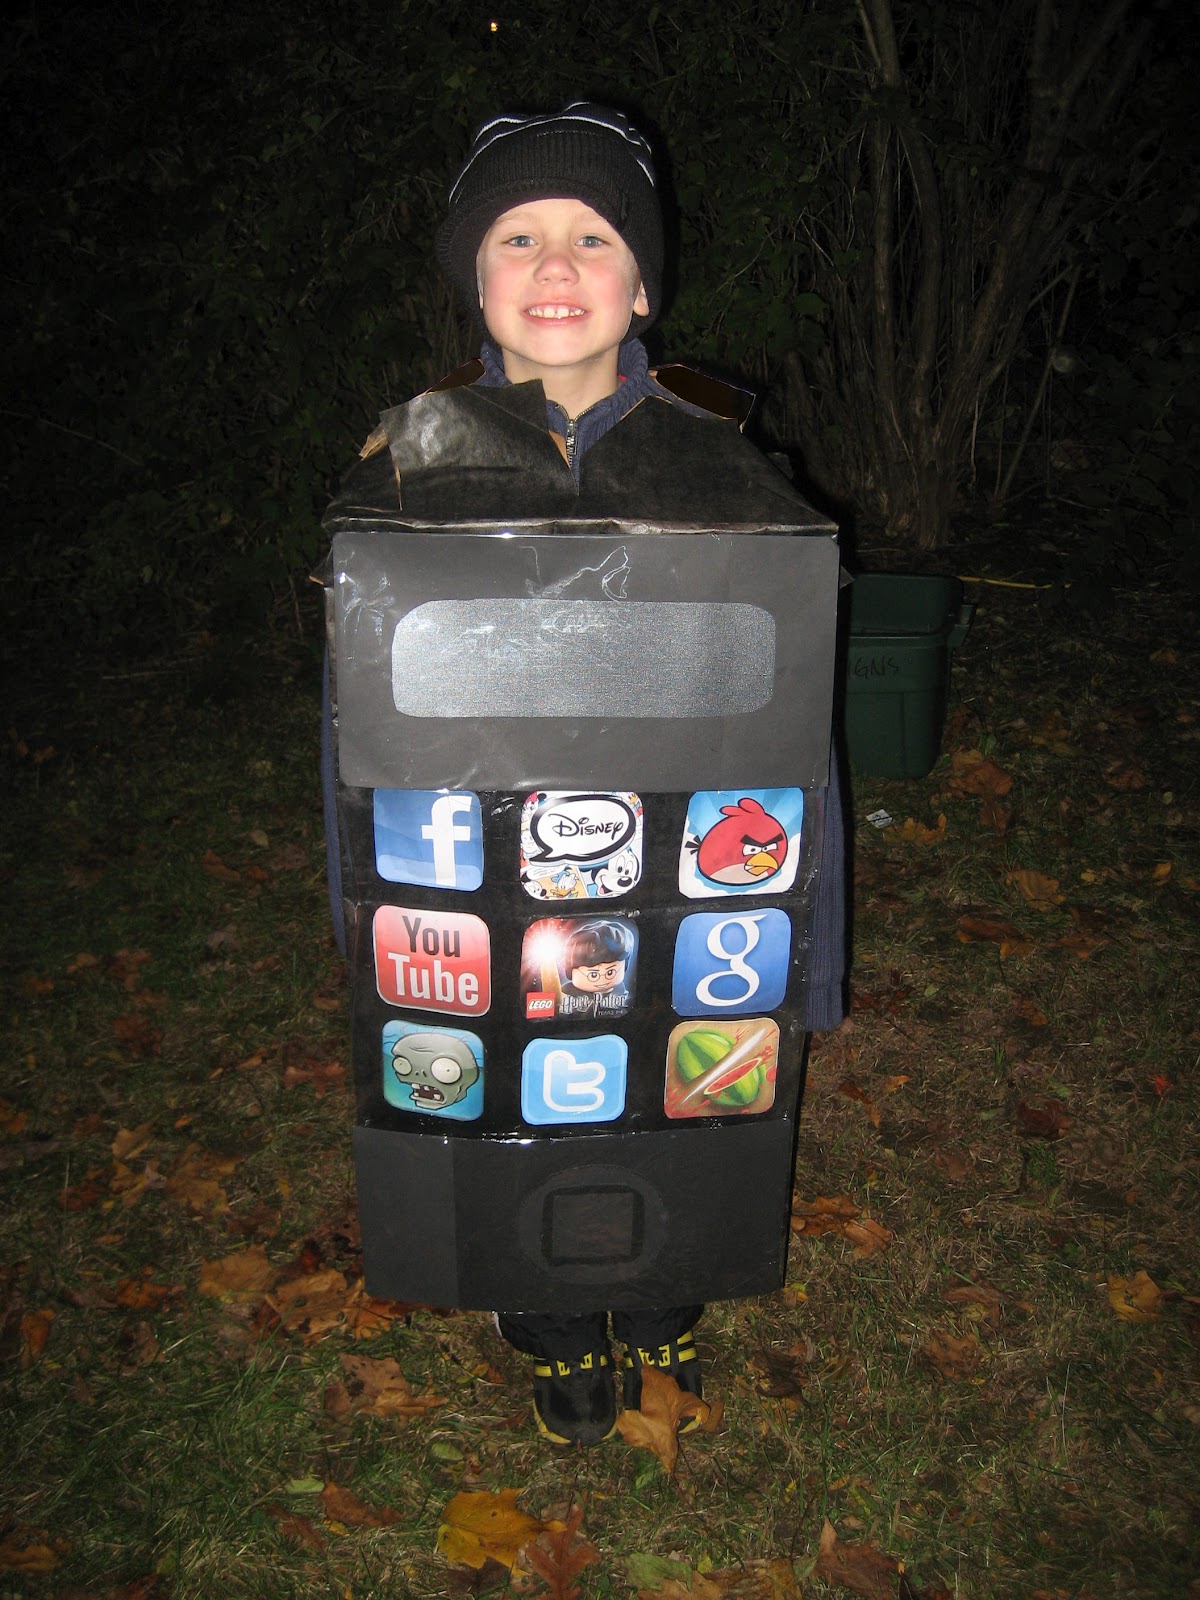
While getting ready for Disney, we had planned out the costume that my 8 year old son wanted to be for Halloween. Final verdict...Yes....the I Phone. Great idea, inexpensive and fun to make. Here are the steps to create this fun costume.
- First, buy a pack of lawn and leaf bags. Sold almost anywhere,especially hardware stores.
- Next, unfold one bag,open it and place it outside to spray paint. ( I placed it over a planter pole in order to paint the entire bag.)
- Make sure you spray a few coats of spray paint onto the paper bag and let dry in between coats just to make sure any logos on the bag are fully covered.
- Next, choose which images you would like to make for your "Apps". My son chose several that he liked and of course I insisted he have a Disney App! I copied each image and sized them accordingly. I wanted to have enough for 3 rows(Aprox 4-5 inches square).
- After printing all my "Apps", I glued them to a second piece of paper and cut them individually.
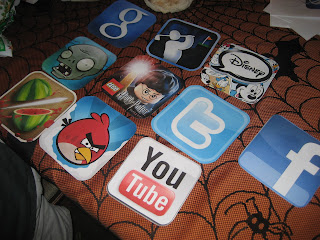
- For each "App" I glued a third piece of black construction paper (on three sides..to make a "pocket"). Then I glued each "App" to the painted lawn and leaf bag.***This sounds like many steps but it is really easy!!!***
- This is the fun part...each "App" lights up!!! I put a small glow stick into each pocket on Halloween night.
- To finish the costume, I cut out the shapes for the power button and of course the apple and camera lens on the back of the costume. For a finished look, I placed clear wrap over all the apps to make the "screen" shiny. I made a cross slit on the top of the bag and a smaller single slit on each side of the bag for his head and arms.
LET ME TELL YOU, HE WAS TURNING HEADS AND MAKING PEOPLE SMILE ALL NIGHT!!! EVERYONE LOVED THE COSTUME, ESPECIALLY MY SON!!!!
OK, so it's been a long, long while since my last post. I think it's because I am a fledgling blogger who would like to create a really great blog and am feeling a little overwhelmed . It's learning how to balance and I don't think I have mastered the art of it yet. I think about it all the time. How do I balance being a wife, mother, and a nurse(working 30-40 hours weekly) while volunteering, hosting play dates, maintaining a household,keeping up with friends and trying to create great projects to share with the blogging community. ( I am exhausted thinking about it:| ! )
The answer.....I just have to dedicate the time like everything else I do. Half an hour every night (or at least a few days a week) should start me on the blogging path. There are just too many great ideas that I would like to share with everyone. Especially in this time of economic crisis, I have some inexpensive ideas to make your Halloween fun and affordably creative!